As Shopify stores are solely for the purpose of Ecommerce, your Shopify store will be aimed at selling online. To sell online you will need to manage your orders, so we have laid out a simple guide to do so.
If you are interested in starting your own shopify store, we are a Shopify Partner so reach out and see how we can help.
Step 1 : Finding where to manage orders
When you access your Shopify admin dashboard, you will see a menu on the left-hand side of the page. Click onto orders.
This will show you all current and previous orders. By clicking on an order number, you will see the details of that order display.

Step 2 : Seeing an orders timeline
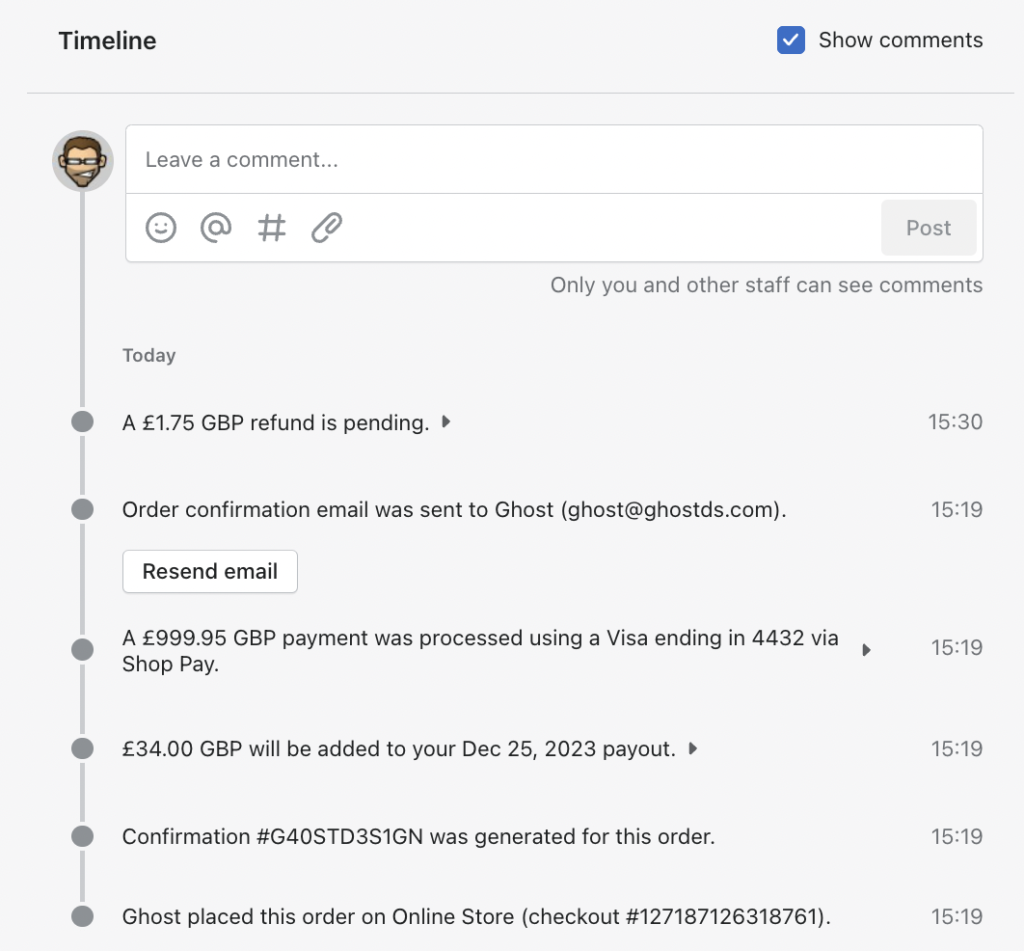
Every order will have a details history called a ‘timeline’. You can also add notes and comments to the timeline which allows you to communicate with other staff members, attach files and link to other products, orders, and customers.
The timeline section of an order is available by clicking on the order number and scrolling down to the timeline section.

Step 3 : Viewing payment events from the timeline
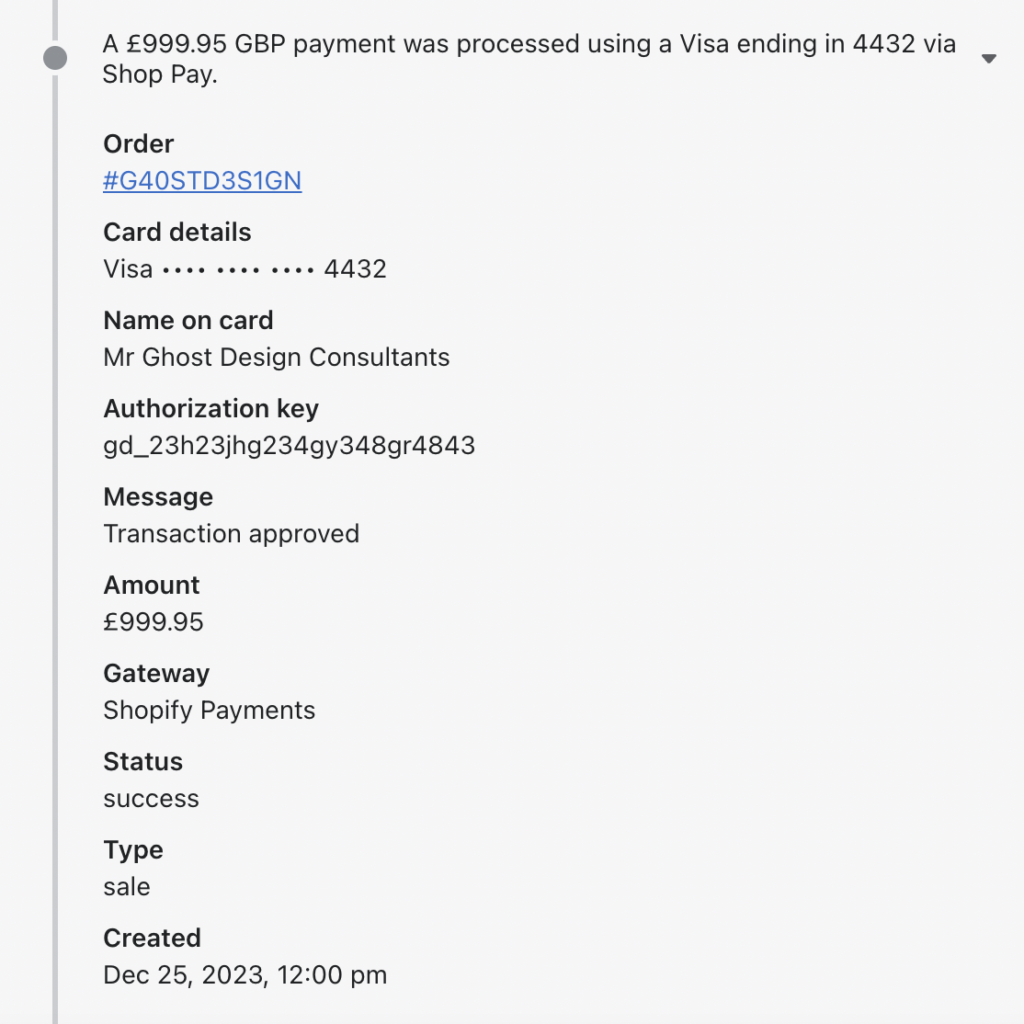
When a customer pays for their order, the payment details can be found on the timeline listed as a payment event. This event can be expanded for more details around the payment. This is handy if you need to troubleshoot a failed payment or a refund.
In the timeline section, click on the payment event to see more details.

Step 4 : Add tags, notes, or edit an order
You can update all the information associated with an order. When on a specific order number, you can update customer information, add, or remove order notes or tags.
At the top of the right-hand side, you’ll see an area if the custom left any notes, you can edit, update, or remove the notes here.
In the middle, you will see the customer section. Here you can change the contact information, the shipping address, and the billing address.
At the bottom you will see an option to find or create tags for an order.

Step 5 : Contacting a customer about an order
If you need to contact the customer about the order, in the custom section you will see‘Contact Information’. This will store either an email or a phone number.
With a phone number call the number to contact the customer.
With an email, click the customers email address and it will give you a pop-up contact form which you can use to reach out to the customer with a message of your choice.

Step 6 : Re-sending an order confirmation email to a customer
If the customer needs their order confirmation re-sending, you can do this easily from the order page. Search for the order number or name. Within the order timeline, click the resend email button.

Step 7 : Fulfil the order to your customer
Once the order is physically fulfilled which includes packing and shipping the order, click the fulfil item button.
The order will remain in the list but will now show as fulfilled. So you have a record of the order to refer back to if needed.


