In this article we are going to cover the basics of changing the PHP version of your website in your hosting control panel. If you are unsure of how to get access your hosting control panel, please follow the article here.
Your PHP version will need changing periodically as WordPress updates their core and older PHP version loose support. This helps to keep your website up to date, safe and secure.
Step 1: Accessing the Switch PHP version setting
Once signed into your Hosting Control Panel, you will see various icon options. Select ‘Switch PHP Version’ from the list.
Step 2: Understanding what PHP is on your website
WordPress is written using the scripting language PHP. similar to WordPress, PHP is also open source. PHP is a server side language, with means that it runs on your web hosting server. Whenever a user visits your website, their browser contacts your server to request the page.
to Run WordPress, your server will need to use at least PHP version 5.2. However at the time of writing (2nd March 2023), it is currently recommended that it be PHP 7.4 and above.
Step 3: Changing the PHP version of your website
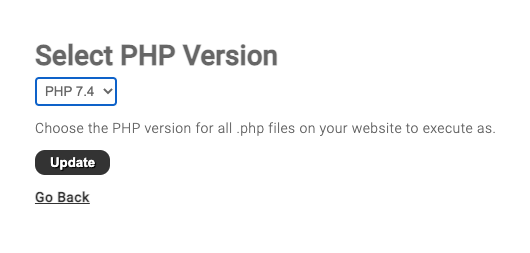
Select the desired version of PHP that you require for your website from the dropdown list. Click the update button when you are ready to execute the new PHP version.
Step 4: Updating your .htaccess if needed
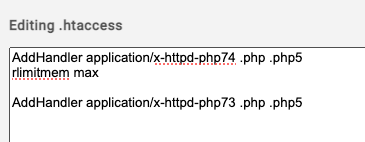
Sometimes, you may need to update the .htaccess file inside and outside of your public_html folder to execute the php version change. To do this from your hosting control panel you go to the ‘File Manager’. You will land on the root folder where you will see a .htaccess file, right click and edit this file. You will see a line along the lines of ‘AddHandler application/x-httpd-php74 .php .php5’. The end part which says ‘php74.php’ shows you which version it is executing. If there is multiple lines, remove them until you have only the line relevant to the version you are updating which in this case is 7.4. Repeat this process on the .htaccess in the public_html folder.
